
Over the last few years, it has been established that a security camera is a very necessary tool to secure one’s house or property. We don’t like to leave our property exposed so a security camera is a must. One can monitor his house or business through this security system.
People used to place security cameras at different locations according to their requirements. However, installing security cameras under the eaves is one of the most preferred locations by some people.
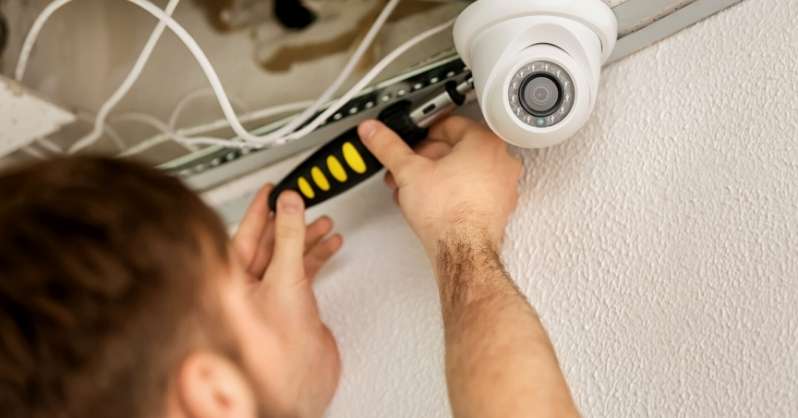
In this article, I’ll show you how to install security cameras under the eaves. Be sure to read all the way to the end.
The Easiest Way of Installing Security Cameras Under Eaves
Having security cameras installed under the eaves is a great choice for you since you can monitor a wide area from this location. You can monitor your driveway, yard, gate, and other areas around your home if you place your security camera higher off the ground, under your house’s eaves.
For a common person who isn’t used to doing this type of work, placing it under the eaves is a very sensitive task. You have to consider some important factors, such as the accurate connection of the power cable, effective tools, and knowledge of the installation process.
Another way to install a security camera under the eaves is to hire a professional person who will install it properly in that place. But, many homeowners don’t like to hire a professional, rather they like to install it on their own. I praise it because it is a cost-effective idea.
However, you should measure other things which come after an improper installation. For instance, if you fail to place it properly, your security camera can fall off during a stormy night or strong wind. To avoid this kind of accident, you need to follow the proper and right installation process.
Follow The Steps Below:
Make A Plan
In this step, you need to make a few decisions that are not directly related to the installation process. Your whole project might become frivolous if you make a mistake at this step. It is recommended that you sketch first and avoid blind spots that might cause you problems.
If you do not map the area then you will place your security camera in a place that has some blind spots. Eventually, this will not cover the whole problem. So make sure you have made an excellent plan for installation.
Wire Route Should Be Measure
If you want to install wireless security camera then you do not need to make a hassle in this step. All you have to connect to your WiFi or your device via the internet.
However, if you want to install a wired security camera then there will be some tasks for you, that you need to do while you are installing a security camera under the eaves.
Measure the eave’s length and which location you have selected to place your security camera, which means the distance between the wall and the eave’s end. If its length comes medium or short then you can use an aluminum strip for matching.
Check the Ethernet cable and other components of your security camera. Coaxial cables are generally used for CCTV cameras, so if you have one, you can use this one. However, measure your camera’s wire route. You can use your attic to connect your surveillance camera to a video recorder.
In Soffit You Need To Drill Holes
Make a pathway through the soffit for your Ethernet cable so that you may pass the Ethernet cable to connect your surveillance camera. Now, you need to drill a hole towards the soffit. Because it is a sensitive task, you should be extra cautious to avoid any disorder. This cable will pass through this hole towards the port of your security camera.
Some experts suggest another way to pass the Ethernet cable, which is, by opening the part of the soffit. To do this, it is necessary to get a ladder so that you can climb up there. Every soffit, especially vinyl soffit, is connected by joints. You can easily identify this and peel it back by using a removal tool of siding. This tool can be used if there are nails or pins which are used to join them.
Though for the letter one, you will be no need to hire drilling machine it does not seem more effective as the previous one.
Run The Cables
As you are running your Ethernet cable, you will need fish tape, which will help you complete this step effectively. The fish tape will be used as a mediator which will transfer your cable through the hole.
You need to insert the fish tape in your room first, from where your video recorder will operate. Shortly after that, you will go into your room and tape the end of your Ethernet cable to the fish tape. Then draw out your cable from outside.
Mount Your Camera
I have mentioned the aluminum strip, now you need to use this one for the composition of your task. See the required holes in the bracket of your camera so that you may know how many holes you need to drill into the aluminum strip.
It is worthy that your eave color should be similar to the color of the aluminum strip. Or color your aluminum strip accordingly. Then attach the bracket of the security camera towards the aluminum strip through nuts and tight these.
Splice your Ethernet cable, for that, you have to use the splicing tool and try to make the cable firm towards the jacks of Ethernet in your camera kit, following the guide’s instructions.
Now, you have to connect the camera’s power source as well as an Ethernet cable to your security camera. Your power connection system should be done before the installation of your security camera and aluminum strip.
Bend the aluminum strip so that you can simply slide it into the vinyl soffit. This is the simple process of installing a security camera under the eave. However, there is another little step to running your project completely.
Finishing Touch
You need to connect the opposite side of your Ethernet cable to the video recorder which is set up in your house so that it can record video footage. After connecting the cable, set up its configuration by following the guides of the instructor. Here you are! Your installation is done.
Conclusion
Now that you’re confident enough, you shouldn’t have any trouble installing cameras under the eaves. As I have mentioned everything in simple steps, you should easily mount a security camera beneath the eaves.
Remember, a sophisticated and creative mind always endeavors to attain the best advantages from a tool. So try to make the best use of your security camera.
Related Guide: