
Previously the complex coordination of security systems frequently required professionals’ help to install and set up cameras even at home. But not anymore!
Thanks to the progression of the DIY security scheme, now homeowners, tenants, and even small business holders can effortlessly install security cameras.
Essentially, the necessities of the installation process of a Swann security camera can be determined by a system’s complexity. Like from standalone plug ‘n’ play wireless cameras to complicated multi-camera systems the method can vary.
Now if you have bought a Swann wireless security camera for your home, but are confused about its installation process then you’ve entered the right place. This article is all about guiding you regarding the matter.
So, without any further discussion let’s know about how to install Swann wireless security cameras at home.
Taking Basic Preparations
Initially, it is important to take some basic preparations before getting into any sort of technicalities of the installation procedure. Because it not only makes your installation easier but also guarantees that the security system is capable of fulfilling your home’s security requirements.
Therefore, make a strategy in advance about where you should really install your Swann security camera, from which direction it can cover the maximum footage, or at what angle it should be positioned.
In fact, it would be even better if you can check and understand your existing security status at first and then go ahead with buying a security camera fitting the type your home actually needs.
Always keep in mind that planning is the key!
Find Suitable Places to Install your Cameras
Not any place or spot can be perfect for you to install security cameras. You should select particular areas that can capture the best image and visualization.
Generally, the placement of security cameras completely depends on the structure of your home or property. In case the installation of your security camera is not done in suitable areas, the whole process could become relatively pointless.
Some essential specifics are pointed out-
- Ensure supervising entrance and exit areas, including the garage if you have any.
- A clear and rich view should be captured.
- Keep the camera’s direction at a low angle.
- For covering blind spots, install multiple cameras.
- Check for issues of lighting to prevent affecting image quality.
- Make sure the camera is placed at an unreachable distance.
Easy Swann Wireless Security Camera Installation: Step-by-Step Guidelines
After you are done selecting the best spots for your security cameras, you’re all set to go for the installation process. You can do both screwing and sticking, whichever you prefer. Below are step-by-step instructions:
Step 1: Setting the Manual to an Ideal Position
As soon as you open the package, you will get a user manual or template inside it. Put the manual on top of the surface where you are planning to install the Swann security camera.
Step 2: Attaching your Bolts Keeping ¼ out
If you’re working on wooden surfaces, make sure to keep a quarter of your bolt/screw out while drilling. And for surfaces like brick, drill 2 holes of 6mm on the template that came with the package and attach it to your wall. Then keep a quarter out of each bolt/screw out.
Step 3: Using Sticky Strips
To save your wall from drilling holes, you can use the sticky strips included with the Swann security camera. First, you need to put the strip behind the camera. Then, force pressure for about 30 seconds. Next, simply take out the strip and attach the camera to your wall.
Step 4: Setting the Base to Secure it
Now, it’s time to set the base by lining it up with the screws. After that, slide it downwards in order to secure the base in an accurate place.
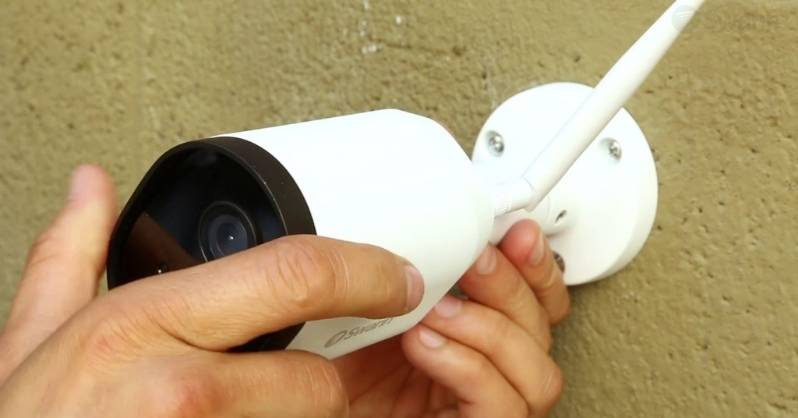
Step 5: Adjusting the Camera
Finally, after you have completed attaching your camera, you can watch it using the app. If it’s not placed as per your preference, you can change and adjust its position.
2 Categories of Swann Installation
When it comes to the process of installing the security camera, there are 2 categories available that you can opt for. They are-
Swann DIY Installation
Though Swann’s wireless security cameras are designed with the intention of DIY installation, this method might not work for all. People who are uncomfortable using tools might prefer hiring others to get the work done.
Hence, both benefits and drawbacks exist for Swann DIY installation.
Pros
- After purchasing the product, DIY installation costs free.
- Comparatively, the installation of Swann’s security cameras is easy.
Cons
- DIY installation might not work if you are not comfortable working with tools.
- There is no warranty of coverage for installing the products in an improper way by mistake.
Swann Professional Installation
This option is for people who don’t know much about using tools and lack confidence in doing the setup by themselves. So if you are afraid of messing up the installation process, you can take professionals’ help.
This also includes both the benefits and drawbacks.
Pros
- Professionals’ help makes the installation process much easier and smoother for customers.
- In addition to setting up the camera, they also provide tutorials for learning as well as a warranty for malfunctioning triggered by improper installation.
Cons
- Professional installation increases the amount of expense as one needs to pay more for it.
- Swann doesn’t provide any professionals’ help, so the installation process involves some third-party’s assistance.
Conclusion
At this point of the article, I am pretty sure you have acknowledged a sufficient amount of information regarding this subject matter.
Usually, Swann is known to be a common preference for DIY home security systems. Depending on your situation you can select DIY or professional installing methods, whichever you prefer.
However, while installing security cameras for your home don’t forget to take enough of your time, plan in advance, and ask for professionals’ help if needed. To sum up, read the instructions meticulously and act in accordance with them to get the best outcome.
Related Article: